

 Commission disclosure: This article contains an affiliate link to AudGram. If you choose to use it, ProdifyDigital may earn a commission at no extra cost to you.
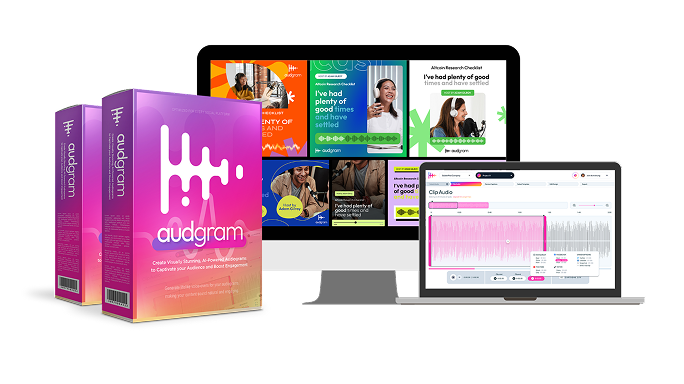
AudGram is a web-based platform for turning audio or video into visual audiogram clips. This guide focuses on export planning and archiving so podcasters, educators, and small marketing teams can keep files organized, protect approved assets, and avoid unnecessary re-renders before platform retention ends.
What an export plan should cover before rendering
Before you export anything, decide what the finished asset needs to do. A useful plan starts with the intended use, the target aspect ratio, the caption style, and the version you want to keep as your working master. In practice, that means answering four questions: which clip is final, where it will be used, what design elements are required, and which files should be saved for later edits.

According to the AudGram live offer checked on 2026-09-14, the entry plan includes 300 monthly credits, and 1 credit equals 1 minute of rendering. It also lists 50 GB of storage and 30 days of data retention. Those limits make planning important. If a project is likely to need revisions, it is usually better to organize the source assets first and then render once with a clear version name rather than repeatedly testing exports.
A simple export plan can include:
- the working clip length and final duration
- the intended format, such as square, landscape, or portrait
- the approved caption text and brand styling
- the master audio or video source file
- the final export filename and storage location
If you need a deeper primer on preparing the source clip before this stage, see choosing podcast excerpts for audiograms and reviewing captions before export.
Set up version control for masters, drafts, and finals
Version control keeps export work from becoming a pile of nearly identical files. Use clear labels for the original source, the in-progress draft, and the approved final. For example: showname_episode24_master.mp3, showname_episode24_audiogram-draft-v1.mp4, and showname_episode24_audiogram-final-1×1.mp4. The exact naming convention matters less than consistency.
Keep the master asset untouched. If you need to trim, crop, or test a new caption layout, do it from a copy. That way, you can return to the original file if a client asks for a different cut or if you need a second version for another platform. This also helps avoid re-rendering the same material simply because the previous export was overwritten or hard to locate.
For teams, add a short status tag to each file name or folder name:
- draft for works in progress
- review for assets waiting on approval
- final for approved exports
- archive for completed project bundles
That structure is especially useful when multiple people touch the same episode or campaign. It keeps the approved version visible and reduces the chance of exporting from an outdated draft.
Build a render log to prevent duplicate renders
A render log is a lightweight record of what you exported, when you exported it, and why. It can live in a spreadsheet, a project note, or a shared folder index. The point is to prevent duplicate renders and make it easy to trace which version was used where.
Your log should record at least:
- project name
- source file name
- aspect ratio
- caption version
- export date
- render length in minutes
- status, such as approved, revised, or archived
Hypothetical example: a marketing team exports a 42-second teaser in square format, then later realizes they also need portrait and landscape versions. If the first render is logged clearly, the team can reuse the same approved clip and only render the two additional versions that are actually needed, instead of creating a fresh square file by mistake. That saves time and helps keep the campaign aligned with the available credit balance.
Because the offer states that one credit equals one minute of rendering, your log should also help you estimate the rendering minutes a campaign will consume. For longer content, a one-minute clip and a 59-minute clip have very different budget impacts. That is a planning issue, not a creative one, and it should be tracked before exports begin.
For caption-specific quality steps that support this stage, review caption checking before export. For layout decisions that affect what should be logged, see adapting audiograms across formats.
Archive originals, captions, and brand assets before retention expires
The live offer checked on 2026-09-14 includes 50 GB of storage and 30 days of data retention. That means your own archive should not depend on the platform alone. Save the source files, caption text, logo files, font references, and any approved creative notes in your own storage system as soon as the project is finalized.
A practical archive bundle can include:
- the original audio or video source
- the final exported audiogram
- the caption transcript after review
- the brand logo and background artwork used
- a text note explaining the approved template, colors, and aspect ratio
- the render log entry for that version
This is useful when a project comes back months later and someone asks for a fresh cut in a new aspect ratio. If the source and approval notes are already archived, you can rebuild the asset without guessing at the original settings.
For a related workflow on source selection, see choosing podcast excerpts for audiograms. If the finished design needs to be rebuilt for a different layout, adapting audiograms across formats is the companion step.
A storage-and-export checklist for repeat campaigns
When you are producing recurring podcast promos, course clips, or team updates, the easiest system is a repeatable checklist. Use the same order every time so the process becomes predictable and easy to hand off.
- Confirm the approved source clip and keep the master untouched.
- Check the transcript, names, numbers, and negations before export.
- Choose the target aspect ratio and confirm safe space for text.
- Name the draft with a version number.
- Export once, then log the render details.
- Store the final file, transcript, and brand assets together.
- Move the completed package into archive storage before retention ends.
- Note any needed revisions so the next export starts from the correct version.
For teams with recurring content calendars, this checklist can prevent the most common problems: re-rendering the same clip, losing the approved transcript, or storing the wrong final format. It also makes handoffs easier when a podcast producer, educator, or marketer is not the person who will revisit the project later.
If you are still comparing what belongs in the entry offer versus an upgraded tier, the commercial overview is covered in the AudGram review and offer limits. For practical export use, the key is to plan conservatively: treat credits as a finite render budget, treat retention as a deadline, and treat every final asset as something that should be archived outside the platform.
If you want the full product page for context while you plan your workflow, use AudGram as a reference, then return to your own archive system before the retention window closes.
Closing workflow advice
The most reliable export process is not the fastest one; it is the one you can repeat without losing masters, captions, or final files. If you name versions consistently, log every render, and archive source assets promptly, you will be able to reuse approved work without wasting credits or rebuilding projects from scratch.
Reader questions
How should I name AudGram export files so I can find the final version later?
Use one consistent naming pattern that separates the master, draft, review, and final files. A practical format is project name plus episode or campaign identifier plus version label, such as master, draft-v1, or final-1×1. The exact convention matters less than keeping it the same every time, so you can find the approved file quickly and avoid confusing it with an earlier draft.
What should I put in a render log for each export?
Track the source file, aspect ratio, caption version, export date, render length, and approval status. If your team revises the same audiogram more than once, also note which version was approved and which exports were discarded. That makes it easier to estimate credit use and avoids rendering the same clip twice by mistake.
What files should I archive besides the final audiogram?
Keep the original audio or video source, the final export, the reviewed transcript or caption text, the logo or background art used, and a note about the approved template and aspect ratio. If your workflow depends on a specific font, color set, or crop decision, store that too. The goal is to preserve enough context to rebuild the asset without guessing later.
How do credits affect export planning on the entry offer?
The live offer checked on 2026-09-14 states that one credit equals one minute of rendering and that the plan includes 300 monthly credits. So a short clip and a long clip do not have the same cost footprint. In practice, that means you should estimate the total render time for a campaign before exporting, especially if you are preparing multiple format versions from the same source.
Why should I plan for archiving before the retention period ends?
Because the offer lists 30 days of data retention, your own archive should not depend on the platform alone. Saving source files, captions, and brand assets early protects you if a client wants a new cut later or if you need to rebuild a final export after the retention window. It also reduces the chance of losing the approved version when a project is revisited months later.
